
Warning
You're browsing the old v2.x documentation. This version is no longer maintained. Click here to go the v3.x documentation.
Step 2.1: Designing the screen
Let's do the easy part first, that is drawing the screen. Let's enlist what need to be visible on the screen:
- A falling piece, that can be of 7 kinds of shapes, called Tetrominoes, each can be rotated 90 degrees.
- A playfield where the pieces are falling down. We will use one character as a block and we will draw a frame around the playfield to mark its boundaries.
- We'll display the current level. This is a number between 1 and 10 that affects the game speed and the bonus added on clearing rows.
- A score counter and a variable that holds the highest score within the program's lifecycle.
- An area on screen where we display what the next shape will be. This is called the preview window.
For drawing screen prototypes you can use Krissz's online PETSCII Editor, or you can use the C64 itself or just the good old checkered paper. I opted for the first and here's what I've come up with:
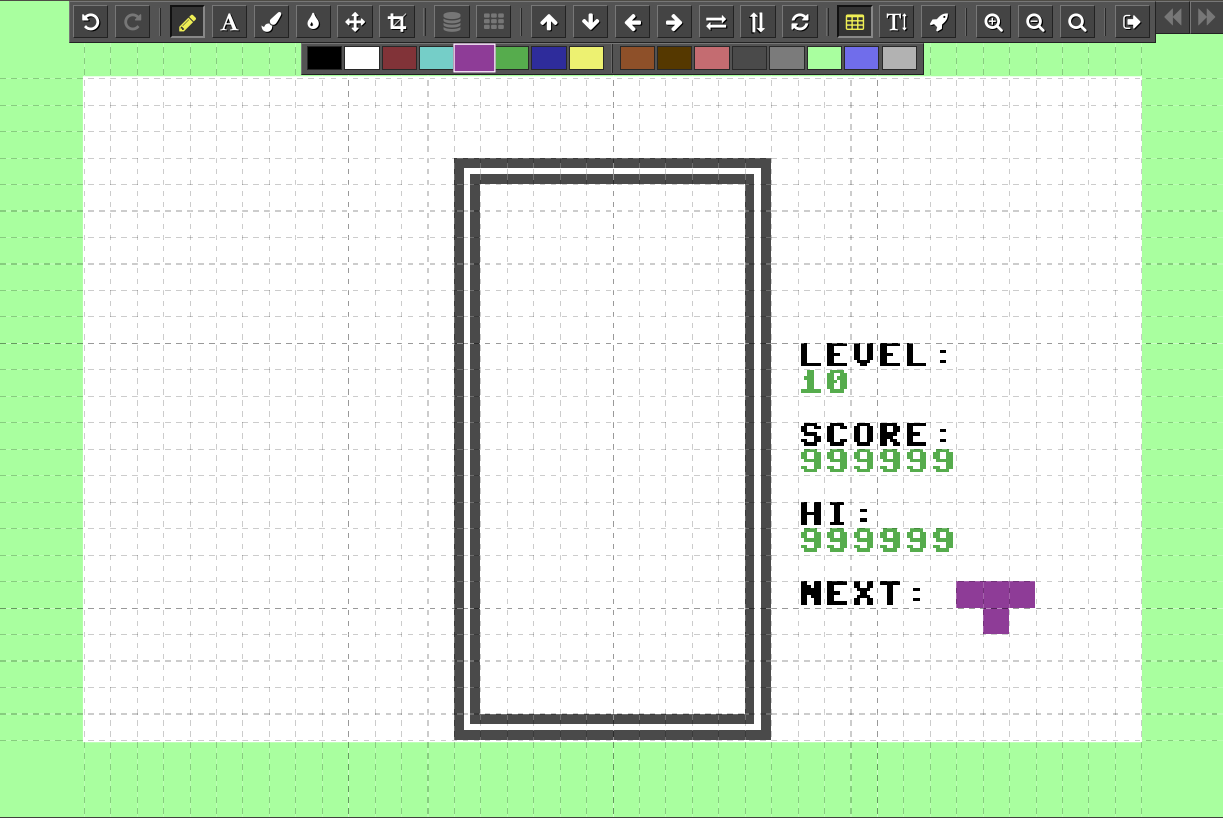
I know it looks very primitive but currently this is all we need. Now let's start writing our program. Let's create a new file called tetris.bas and write a simple program that displays the game screen:
REM -- TETRIS
REM -- An XC=BASIC tutorial game

CONST SCREENRAM = $0400
CONST COLORRAM = $d800

REM -- Clear the screen
MEMSET SCREENRAM, 1000, 32
REM -- Clear color RAM
MEMSET COLORRAM, 1000, 0

REM -- Set border and background color
POKE 53280, 13 : POKE 53281, 1

REM -- Switch to upper case
POKE 53272, 21

REM -- Disable SHIFT + Commodore key
POKE 657,128

REM -- Draw the playfield using a series of PRINT statements
PRINT "{GRAY}"
CURPOS 14, 3
PRINT "{REV_ON}{176}{195}{195}{195}{195}{195}{195}{195}{195}{195}{195}{174}{REV_OFF}"
FOR i! = 4 TO 23
  CURPOS 14, i!
  PRINT "{REV_ON}{194}{REV_OFF}          {REV_ON}{194}{REV_OFF}" : REM 10 spaces in the middle
NEXT
CURPOS 14, 24
PRINT "{REV_ON}{173}{195}{195}{195}{195}{195}{195}{195}{195}{195}{195}{189}{REV_OFF}";
CURPOS 0,0

REM -- Write texts
TEXTAT 27, 10, "level:"
TEXTAT 27, 13, "score:"
TEXTAT 27, 16, "hi:"
TEXTAT 27, 19, "next:"

REM -- Set color to green where numbers will be displayed
MEMSET COLORRAM + 467, 2, 5 : REM row 11, col 27, 2 chars
MEMSET COLORRAM + 587, 6, 5 : REM row 14, col 27, 6 chars
MEMSET COLORRAM + 707, 6, 5 : REM row 17, col 27, 6 chars
If you only programmed in CBM BASIC before, you'll notice some commands that you may not be familiar with (click on the links to learn more):
- CONST is used to define a constant. A constant is not a variable but a value assigned to an identifier. The compiler will replace all matched identifiers in the program with the value. We have defined constants to refer to the Screen RAM and Color RAM later in a convenient way. Also notice that we're using hexadecimal numeric literals, starting with the
$sign. - MEMSET is used to fill up a certain memory range with a single value. We use it to clear the screen by filling up all the screen RAM (1024-2023) with the byte 32, that is, a PETSCII space.
- CURPOS is used to position the cursor somewhere on the screen.
- The variable
i!looks strange in theFORstatement. It is appended with an exclamation mark to flag to the compiler that it is a byte type, a single 8-bit unsigned integer. You can learn more about variables and types here. - Notice the PETSCII codes in curly braces
{}within the string literals inPRINTstatements. Apart from any numeric code, you can use these escape sequences, too. - TEXTAT that is used to write a string anywhere on the screen without affecting the cursor position.
So far all the rest are the same as in good old CBM BASIC.
Note that keywords in XC=BASIC are case-insensitive which means you can write them in UPPERCASE, lowercase or even in Capitalized depending on your style. In this tutorial I will use UPPERCASE.
Warning: unlike keywords, identifiers like variable names, procedure names, etc. are case-sensitive!
Now compile and run the program to see how far we got:
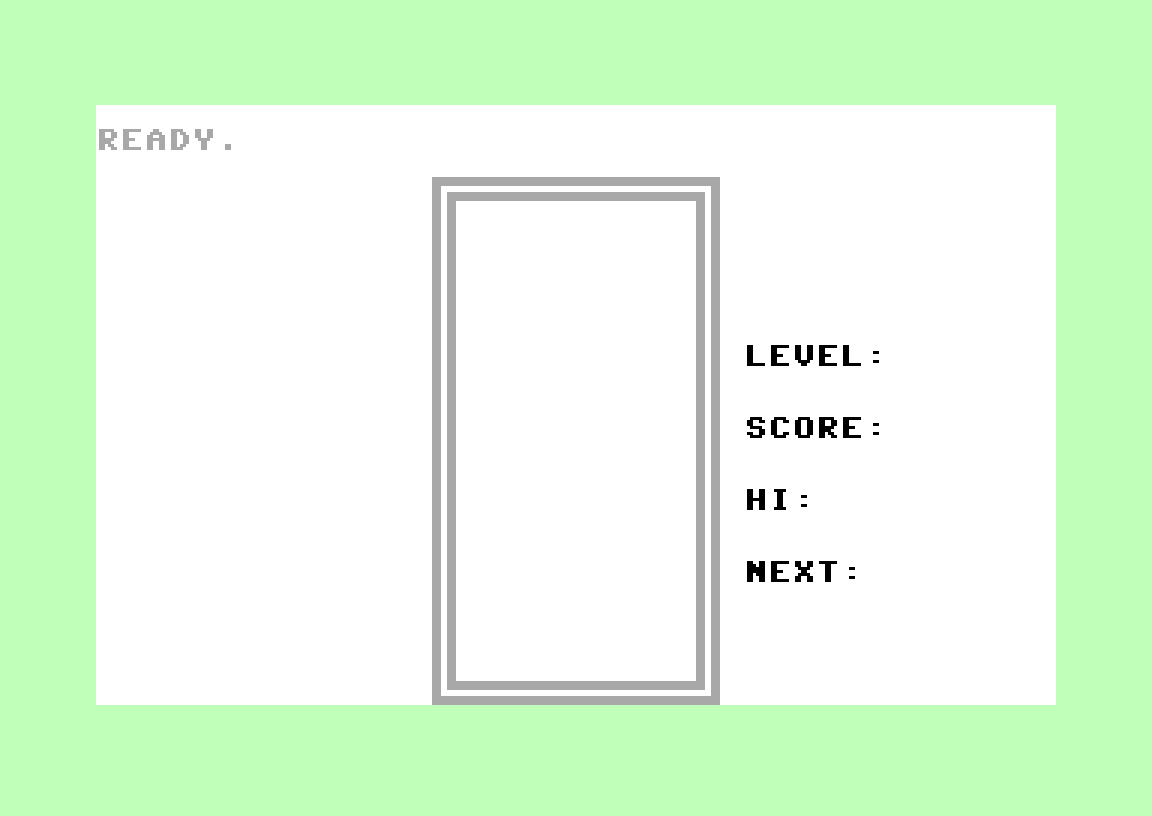
Not a big deal, but we've done the easy part. Click on “next page” to go on and read how we will encode and store the shapes.